
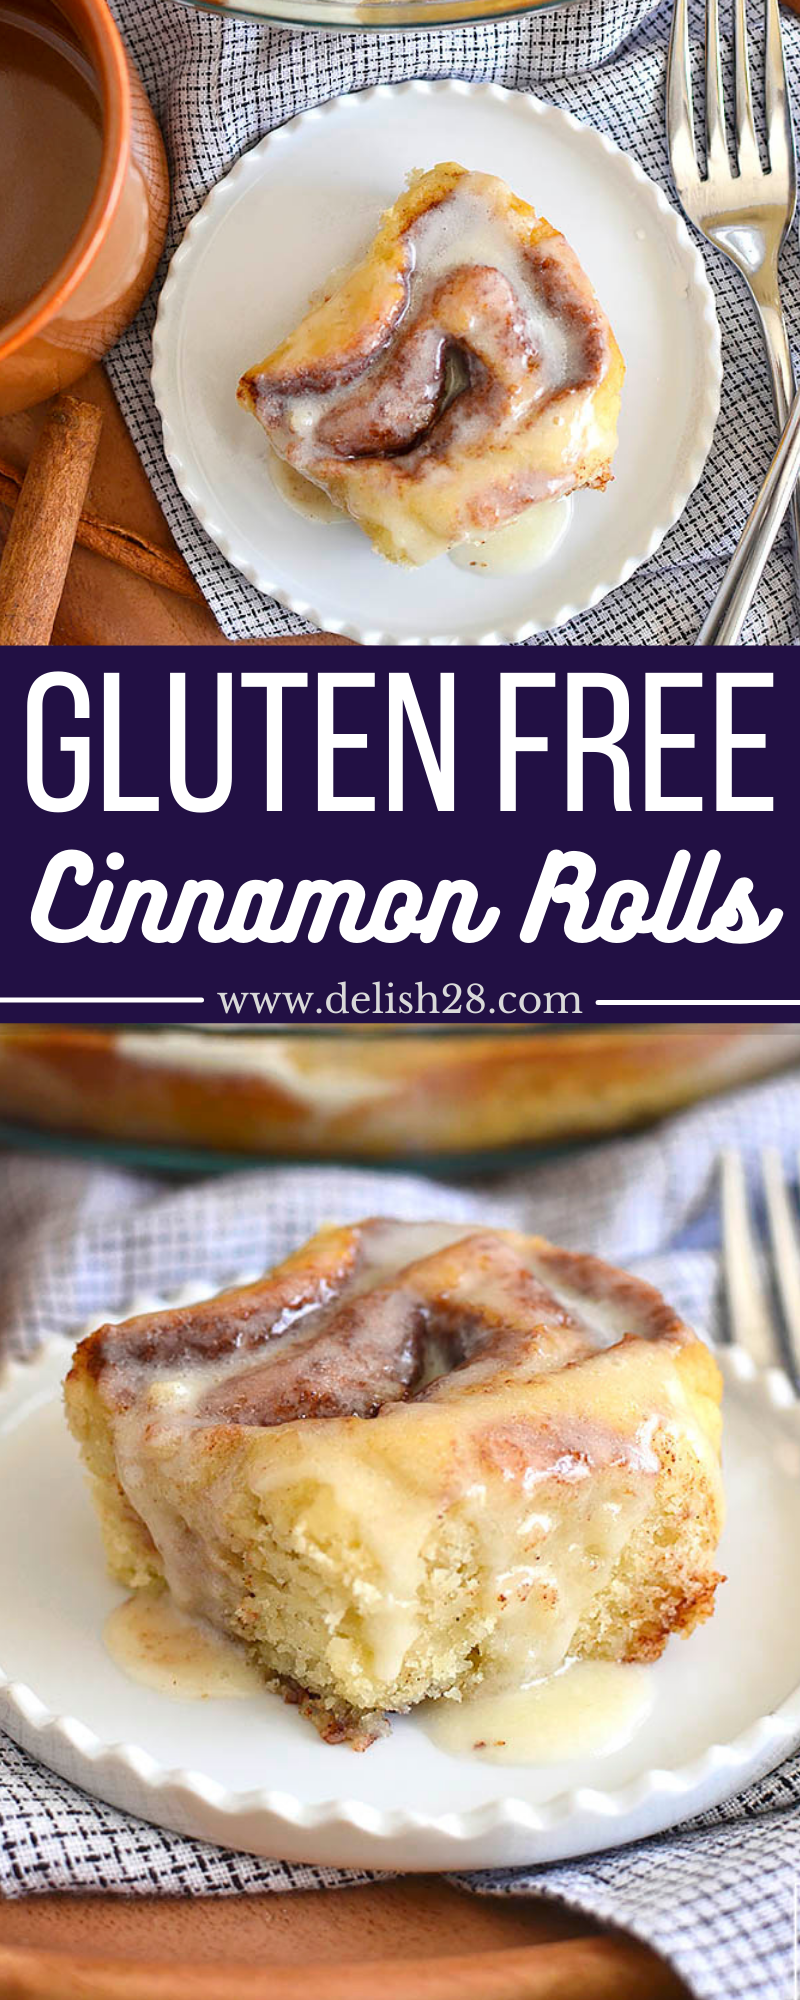
Yes, you can be gluten free and have your cinnamon rolls too! Gluten Free Cinnamon Rolls are sweet, fluffy, and made from pantry staples.
It’s the post you’ve all been sitting tight for – Gluten Free Cinnamon Rolls.If you need to eat gluten free then you know how gravely it sucks (pardon by french) to pass up extraordinary deals with like warm, sweet cinnamon rolls – particularly around the special times of year. I love cinnamon rolls such a lot of that I once payed a little fortune to expedite a skillet of them from a gluten free pastry shop in San Francisco and they were horrrrible! Like blocks! These infants dislike blocks! They’re flaky and awesome and gracious my gosh, I’m simply fixated.
I can’t choose what I love most – the work of art, sweet and cinnamon-y taste of these rolls, or the way that I can eat them any time I need now. It’s a success in general! In addition, for my sans dairy companions, this formula can without much of a stretch be made without dairy by utilizing vegetarian margarine rather than normal spread, and unsweetened almond milk rather than cow’s milk. You ought to have seen the expression all over the first occasion when he attempted a clump of new cinnamon rolls. Wow.
Now, baking regular cinnamon rolls from scratch can be intimidating – baking gluten free cinnamon rolls can be even moreso. That said, after making 12+ batches of these cinnamon rolls over the past two months, here are my best notes and tips.
INGREDIENTS
- makes 12 cinnamon rolls
- For the rolls:
- 1/4 cup butter or vegan butter
- 1 cup milk (see notes)
- 1/3 cup + 1 Tablespoon sugar, divided
- 2-1/4 teaspoons Bob’s Red Mill Active Dry Yeast (or 1 packet of yeast)
- 1 large egg, whisked
- 2-1/2 cups Bob’s Red Mill Gluten-Free 1:1 Baking Flour (blue bag not red bag)
- 2 teaspoons Bob’s Red Mill Baking Powder
- 1/4 teaspoon salt
- For the filling:
- 1/2 cup sugar
- 2 Tablespoons cinnamon
- 1/3 cup extremely soft butter or vegan butter
- For the icing:
- 2 Tablespoons butter or vegan butter
- 1 cup powdered sugar
- 1/2 teaspoon vanilla
- 1-1/2 Tablespoons hot water
DIRECTIONS
- Read post in its entirety before making.
- Add butter to a large glass bowl then melt in the microwave. Add milk and 1 Tablespoon sugar then microwave for an additional 45-50 seconds, stir with a spatula, and take a temperature using an instant read thermometer -we’re looking for 110 degrees. Sprinkle in yeast then stir gently and let sit until foamy, 8 minutes. (If your mixture does not foam, likely your yeast was old and/or the temperature of the milk mixture was too cool or too warm.) Add whisked egg and remaining 1/3 cup sugar then stir gently to combine.
- Meanwhile, in another bowl add gluten-free flour blend, baking powder, and salt then stir with a fork to combine. Add to wet ingredients in two batches, stirring until flour is just incorporated (small lumps remaining are fine) before adding the next batch. Dough should be very soft but not overly sticky – kind of like sugar cookie dough. Cover with a tea towel then set somewhere warm to double in volume, 1 hour. I use my oven’s “bread proof” setting, though placing the pan on a heating pad set to warm, or placing in a warm sunny spot will also work. Your dough may not rise if it’s not in a warm enough spot.
- Combine sugar and cinnamon from filling recipe in a small bowl then set aside. Spray a 9” pie plate with nonstick spray then set aside.
- Scrape the dough onto a large sheet of parchment paper that’s been lightly sprayed with nonstick spray then, with lightly oiled hands, spread dough into a 1/4” thick rectangle, roughly 10×14”. THE KEY TO SUCCESSFULLY SLICING THIS DOUGH IS TO NOT PRESS IT TOO THIN.
- Using your fingers, gently spread softened butter over the dough, leaving 1” clear on the bottom. Sprinkle the cinnamon sugar mixture evenly on top, avoiding the clear strip of dough then, using the parchment paper, gently roll the dough from the top down towards you. Continue to roll the dough into a log using the parchment paper instead of your hands until you reach the bottom. Lightly pinch the seams of the dough together then slice the log into quarters using a sharp knife in one slicing motion vs sawing at the dough. Wipe off knife in between cuts as necessary and/or dip knife in flour blend to prevent sticking. Slice each quarter into thirds for 12 slices total then arrange the slices in the prepared pie plate. Since the dough will be very soft, it helps to use the knife to re-slice and scrape each roll off the parchment paper and into the pan.
- Place rolls somewhere warm to rise until puffy, 30-40 minutes. Again, I use my oven’s “bread proof” setting. During the last 10 minutes of rising time, preheat oven to 350 degrees. Bake rolls for 16-20 minutes, or until golden brown on top, rotating the pan 180 degrees halfway through.
- Let rolls cool for 15 minutes then make the icing. (If you ice them while they’re too hot they’ll absorb all the icing.) Add ingredients for the icing in a bowl then whisk vigorously until smooth. Spoon icing on top of the rolls then serve. Rolls are best the day they’re made but leftovers can be stored in the refrigerator and microwaved for 20-25 seconds uncovered to warm back up.


